Show meclearString uses the neatComponents web development system where websites are constructed by assembling components and then configuring them with dialog-box controls. The easiest way to understand how neatComponents works is to look at an example, like this Blog System, but it is very important to understand that this is only a simple example.
neatComponents can be used to create almost any data-rich Internet application. If you want to build the next Amazon™ or be the next Facebook™, then you can start right here.
Not interested in an example?
Then learn more about the Features of neatComponents or jump to Data Management in depth |
Creating a Blog System
Below is a picture of the finished result - you can see the real blog here. The Blog is made
up of a number of elements displayed on a page. We have kept the graphics to a
minimum in the example, but there is no limit to how things look.
Each page element is made in a similar way, and in this example we will look at the main
blog posting on the left side. 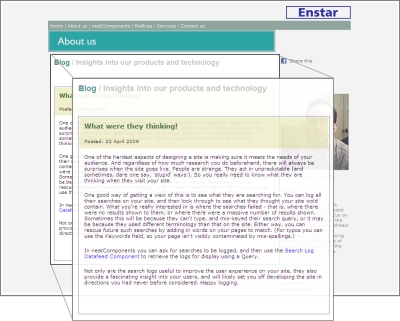 Add the components to the website
The first step is to create the site stucture by simply dragging the components into place to build the blog structure.
Note the Floating Toolbox  showing that we are logged-in with editing rights. showing that we are logged-in with editing rights. 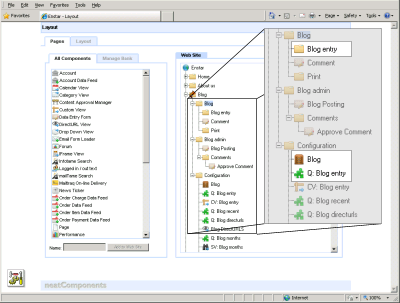
Here we are only interested in three Components:  The Blog Entry Section page that is displayed to the visitor. The Blog Entry Section page that is displayed to the visitor.  The Table where the writer enters their blog posting. The Table where the writer enters their blog posting.  The Query that controls what data from the Table is used. The Query that controls what data from the Table is used. Configure the components
Here we have a custom Data Entry Form  (so that users can enter the data into the Table - the contents of their posting) and then the Query that determines how that form-data is to be used on the page. (so that users can enter the data into the Table - the contents of their posting) and then the Query that determines how that form-data is to be used on the page. Input and output fields can be fully customized to look just as you wish, or you can use the default views shown here with no additional configuration for instant results. 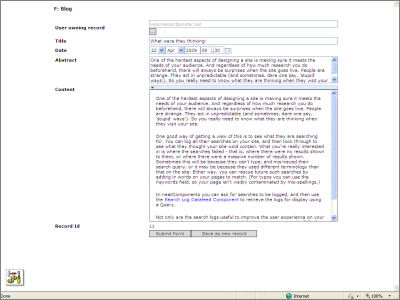 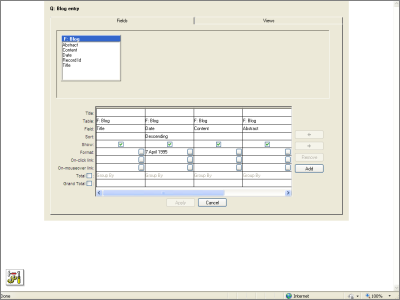
Embed the Query
The Query is then embedded on the Blog Entry page-component using the built-in Tool  and its properties are adjusted to display the finished blog posting. and its properties are adjusted to display the finished blog posting. 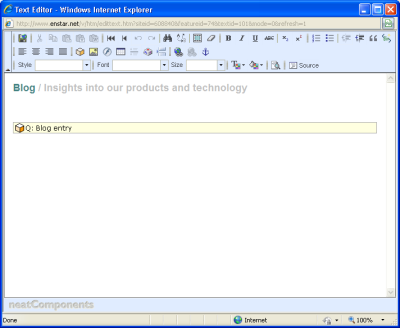 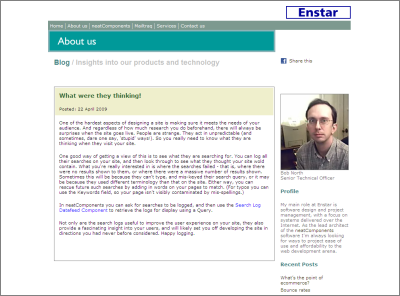
Finish the display
Additional components are added, configured and then embedded in a similar way, to create the rich display of the finished blog system. No coding - no scripting
It goes without saying that all this configuration is done without writing a single line of code, without any scripting, and without breaking a sweat. Learn more
Click to learn more about the Features of neatComponents Learn more about Data Management | 


