| |
clearString neatComponents
| |
|
clearString neatComponents Creating Tables |
| Application Development | ||
Creating Tables | ||
App Building
So far in this tutorial we have introduced you to the basic ways of creating a site using the system. It is a great way to make websites, particularly for commercial users, but its greatest strength is in making it straightforward to build applications that use and manage data.
Data management
There is no need for any conventional manual database management. neatComponents manages all that for you automatically, from the installation of the SQL database, to the management of entities and the impost and export of apps. clearString apps run under a multi-tenant platform, with each app having its own discrete data structure that is secure and independent from all others. There is no Database Management needed, leaving you to get on with actually building your apps.
Introduction to Tables
The next two steps will introduce you to Tables - to store data in your app, and then how to get the information back out again.
This will lead us through database Tables, Data Entry Forms (DEFs) and then introduces Queries, Views and Embeds as the basis for complex app development.
 Data management is at the core of the system, and this tutorial just touches on basic tools and settings to introduce you to the construction process.
When you are ready to build your own applications you will find detailed advanced configuration advice for Managing Data here... complete with advice on creating your data structure and how table relationships work. All of which enables you to create data structures to your exact requirements.
Forms with Email
Our goal here is to create a simple 'inquiry response' form that emails the site owner a simple notification from a visitor.
This exercise will create a page that has a simple web-form on it that collects the name and email address of a visitor. Like this:

Each time the form is submitted, the name and email address gets added to a table in the database. The site owner will be able to see on-screen all the records, and later we will use this information for some other explanations.
Method
There are two components that work together to create the data input and data storage. The data is stored in a Table, and the data is input via a Data Entry Form.
Table
First, add a Table to your application.
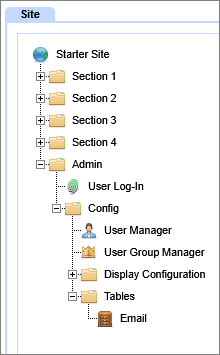
Your users will not be interacting directly with the Table, so place it in the Admin section which they cannot see (unless logged in). You will find a Page/Container called 'Config. As most applications have many hidden components it is sensible to create a folder or section structure so that all tables are in one location, queries in another and so on.
Using the techniques outlined earlier, add a Page to the Config and name it Tables, then add the table to your Starter Site in the position shown below, and rename it to Email.
Reminder: Open the Layout Manager from the Floating Toolbox. Select the ![]() in All Components, and then use the [Add to Web Site] button to place the Table in the Web Site tree structure.
in All Components, and then use the [Add to Web Site] button to place the Table in the Web Site tree structure.
Still in the Layout Manager, go to the new Table, right-click it and select 'Open in new tab'. A new tab will open and the table will be ready to be configured. It is usually more convenient to use the 'Open in new tab' option over the 'Configure ' option when setting up the table in the first place.
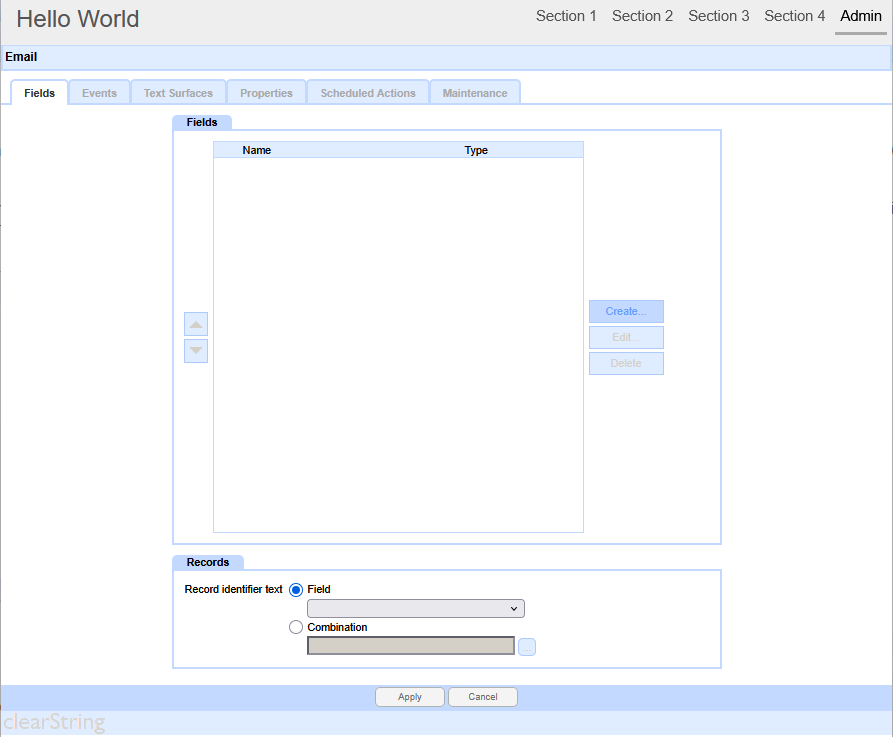
This dialog will make a database table for you that also is the basis for a data input form that will get displayed on the website for visitors to complete,
Create the Fields
Select [Create], then at the 'Field-tab' add the following Fields, one at a time as explained below.
First Name
Last Name
Email Address
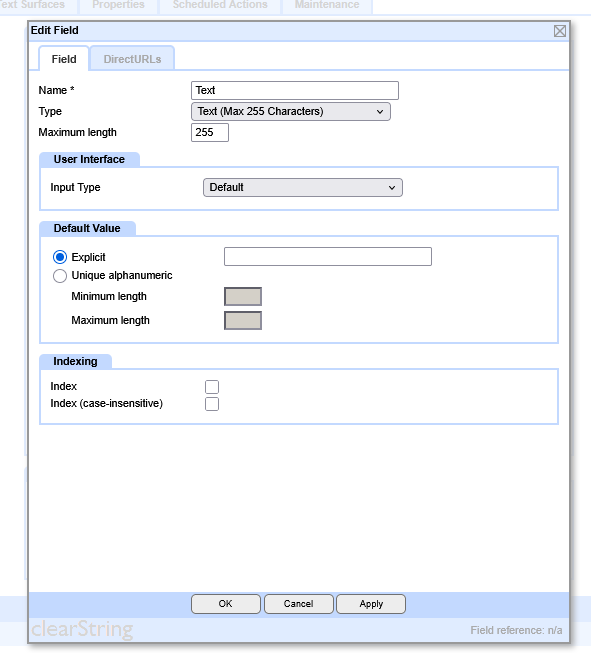
Each table-field has a 'prompt'. This is the text placed next to the entry-box so the visitor knows what to enter in the box.
Enter First Name in the Field Prompt-box, then set the Field Type.
You will see that the Field Type can be selected from a drop-down list.
You should leave the Field Type setting at the default 'Text' for the First Name and Last Name fields,
but, importantly, change the Field Type to 'Email' for the Email Address.
Add a Record Id.
It is always best practice to include a field of type Record Id to be able to access the Unique Identifier for a Record. Read more...
Select the Field Type to be 'Record Id' from the dropdown selector, and add it to the Fields. Use the position control arrows to move it to the top of the list of fields:
.png)
When you have created the four Fields, you need to set the Record Identifier on the main Table - at the bottom of the dialog box.
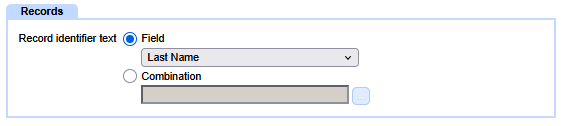
Set the Record Identifier | Field to Last Name.
Click [Apply].
That completes the basic Table construction.
![]() Now, let's make the form to collect the data...
Now, let's make the form to collect the data...
Below the line
Getting Data into your App
This Tutorial is based around creating an online form to collect data for your app to process. The example is a simple one, but the same principles apply whether you are constructing an e-commerce application, a medical questionnaire, insurance claim system, inventory analysis - or whatever.
The platform also supports data acquisition by QR code so that manual and automatic cameras can be used for process or object tracing.
![]()
The neatComponents platform also provides numerous methods for integrating with other systems either on an ad-hoc/one-off basis, or for more automated synchronization.
Read more about Data Import (and Export) here...
Advanced configuration information
1) When you are logged in you can still see the Form that you have created. Use the link 'Click here to submit new record' to view the page as a visitor would see it.
You can click on the record to Edit it, and the form behavior and results display are all fully configurable - but that is beyond this Tutorial.
2)The Toolbox is context sensitive, and the options it offers depend on the Component being used.
The Behavior Editor | Settings | Options section allows you to configure the other form behavior.
3) You can configure the page that is displayed to ordinary visitors after the form submission from the text Surfaces | Post submission entry.
Creating your first app In this section |
|
Creating your first app
We learn how to add a database table. In this section: |
|
 What are we learning here?
Copyright © 2026 Enstar Systems Inc. All rights reserved |