  |
| |
| How-to Resources | ||
Download & Install | ||
Download & Install
1 - Download
Download your Data example from this location: Example Data Usage.ncx
You will see that it is a file-type '.ncx'
Save the file to a convenient location.
2 - Install
Open the Server Manager on your neatComponents installation.
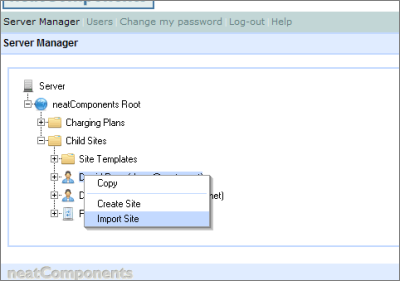
If no Users have been created, right-click on 'Child Sites',
and select Import Site from the context-menu.
You will be able to select the default User you created during installation.
A matching User will appear in the tree automatically.
Browse to the location you saved the ncx export-file, and import.
You can also create a new User who will 'own' the imported Blog System.
Select the 'Users' menu entry at the top of the page and follow the wizard to create your new user.
A matching entry will appear in the tree.
Right-click, and select Import Site from the context-menu
3 - Set the site access
Set the site access to the domain you want your new application to respond to - for example:
http://data.example.com then leave the Server Manager.
You can now access the application directly from a regular browser session for configuration and use.
Configuration advice
1 - A reminder about installing neatComponents on a new machine...
2 - A reminder on how to access the neatComponents Server Manager...
3 - A reminder on how to set child-site access...
4 - Having difficulties with the import process? See Troubleshooting...
Additional Resources |
| Getting started with data |
Copyright © 2026 Enstar Systems Inc. All rights reserved |