| |
clearString neatComponents
| |
|
clearString neatComponents Receive data with an Intersite Communication event |
| Application Development | ||
Receive data with an Intersite Communication event | ||
Receiving Intersite Communication is handled by an Intersite Communication Event, configured on a Table in Site B. When communication is received this event is triggered, and a new record is created in the table.
In Site B
Create a Table, called say "Intersite Communication Listener"
| Field name | Datatype |
| RecordID | Record Id |
| Origin | Text |
| Request Account SID | Text |
| JSON | Large Text |
| JSON Associated files | File |
| JSON Response | Large Text |
Create an Intersite Communication Event
In this Table, in the Events tab, add a new Event, of type Intersite Communication.
Right-click Events, choose, New, Event, Intersite Communication
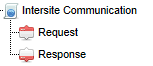
This will show in the Event tree as three nodes:
Right-click the Intersite Communication event node, and in the Properties dialog, enter an endpoint.
.png)
All endpoint names start with "api/" so you do not enter this.
The endpoint name should end with a trailing /.
If Site B is on domain https://www.example.com and test/ is entered as the endpoint, then the full endpoint URL will be:
https://www.example.com/api/test/
and that is what should be used as the Endpoint string in the Site A configuration.
Now configure the properties of the Request node:
.png)
For this map the fields to fields in the current table.
Origin will store the domain name of the where the request came from, ie the domain of Site A
JSON will contain the data being communicated
JSON Associated files will contain a zip file containing files and images referenced by the JSON data
Account SID will contain the Account SID received (including the AC prefix)
Together these let you understand where the data came from.
Process the received data
The next stage will normally be processing the JSON data.
This is done using a Data Import component. To do this we need to configure the Data Import Component, and then use a Data Import action in the event tree to pass the data to the Data Import Component to process.
The Data Import Component will be storing the data in records in a Table, so the first thing will be to create this Table, then create the Data Import Component, and finally configure a Data Import Action.
Create a Table, called say "Data Table"
This should have fields to match the data being communicated. For a simple example, we might have just two fields, in addition to the usual RecordID field:
| Field name | Datatype |
| RecordID | Record Id |
| Text | Text |
| Currency | Currency |
Create a Data Import Component
On the Source tab, set the File Type to JSON
.png)
On the Destination tab, select the Table for the data to be stored in:
.png)
Typically the Record query will be:
@ if the data is a single object or array
$[0] to return data from the first record in an array
$[*] to return all records in an array
For this example we use @ as the data is not in an array.
We then set the field mappings. Note in these mappings, the "Query" field names, shown in the first column, start with a period, so .Currency and .Text
If the data is in an array we could, instead of .Currency etc, use [0] for the first field in the array and [1] for the second in the array etc, but this approach is not recommended as it is less clear what is being mapped, and may need adjustment if the JSON structure being sent is subsequently changed.
For more detail on configuring the Data Import Component, particularly if you are receiving data which needs to be stored in multiple related tables, see the documentation for the Data Import Component.
Configure the Data Import Action
In the Intersite Communications Listener Table, add a data Import action, and configure it:
.png)
In the Data Import section, select the Data Import Component
In the Source section, set the data Source Type to Text, and then in the Text field, select the field that contains the received JSON. If there are associated files, also select the the field with the Associated Files.
Optionally, you can map fields in the Results and the Diagnostics sections.
Scaling and Clustering In this section |
Scaling and Clustering In this section: |
Copyright © 2026 Enstar Systems Inc. All rights reserved |