clearString neatComponents
| |
clearString neatComponents
| |
|
clearString neatComponents The Layout Manager - Adding a component |
| Getting Started | ||
The Layout Manager - Adding a component | ||
Select the Pages-tab in the Layout Manager.
Tip:
Remember, Pages are the primary Responsive container for App building. As well as being simple text surfaces you will be using them to Embed advanced functionality, and use them to act as 'bridges' between Tables and Queries and the Views your Users use to interact with your App. Your entire User Experience is structured around the use of these Responsive pages.
The Pages-tab is where you manage the site structure. You can add new components, rename them and move their position in the site tree. As you add and change components the navigation will be automatically adjusted for you.
If you closed the Layout Manager, mouse over the Toolbox and click on the Layout Manager - the Layout Manager will open again, in a new window.
Creating a new 'Section' on the website
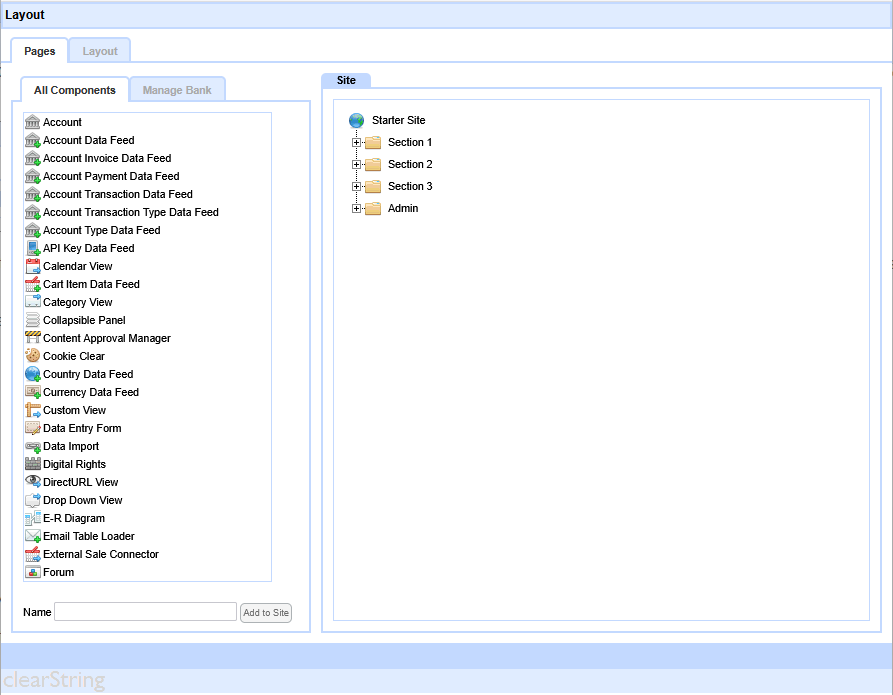
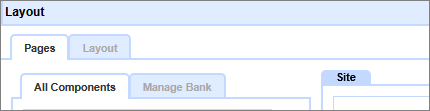
The Pages-tab has two zones: Components, and Site.
The Component zone has two tabs: All Components and Manage Bank.
We will be using the default 'All Components' tab.
Tip:
You can watch this action on a video here...
Add a 'Page' to the Web Site
Scroll-down in the 'All Components' zone and select 'Page' - this will place a new Page in the Name box shown at the bottom of the column.

Call the Page 'Section 4', and click the [Add to Web Site] button.
The new page will now be attached to the mouse cursor. You can now move the mouse cursor over the the 'Web Site' section of the page. As you approach the tree an insertion point ( >--< ) will be displayed. When you are in the correct place - click the left mouse button to insert the new 'Page Component'. Place the Page in the 'Hello World' section in the Web Site view, between 'Section 3' and 'Admin'.
If you make a mistake before you place the Page, clicking anywhere on the page outside the tree area will void the action.
If you place the Page in the wrong location, simply right-click and select 'Move'.If you get an 'Insertion Failed' notice, just try again and position the cursor closer to one of the existing icons.
If you continue to get "Insertion Failed' notices (due to record locking), close the Layout Manager and then reopen it.

A new Page will be added to the Site tree and that will be immediately reflected in the website layout. Refresh the webpage (in the other window open on the website itself) and you will see a new tab appear on the website as the navigation automatically adjusts to the change in the site.
How to remove the 'Page'
If you wanted to remove the page you just added you would return to the Layout Manager and select the 'Section 3' entry in the Site tree.
- Right-click the page to be deleted, and the context menu will open.
- Select 'Delete', and then confirm when asked.
However, for the purposes of this tutorial don't delete the Page - we will be needing it later in the example work-through.
You can go ahead and add subsidiary pages to your new section to follow the existing pattern. It will give you good practice at adding and naming components.
![]() Next - Let's see how to create an Input Form with email submission...
Next - Let's see how to create an Input Form with email submission...
Below the line
Advanced configuration advice
Types of Component:
There are many different types of component. Simple components are stand-alone, such as a Page, and other types of Components are intended to be embedded on a page to provide extended functionality: a Query is a good example. This 'Hello World' trial only uses a few components, just to keep things simple.
The structure and overall appearance of the website is controlled by the Layout Manager. The appearance of individual components is controlled by their own Behavior Editors.
The most basic components are the Page: a Page is a simple webpage, but which can also form branches to the site-tree. The body of a webpage is 'surrounded' by Layout. The Layout Elements control the main appearance of the site and the navigation. Navigation is automatic in a clearString app - as the site is built the navigation will automatically create the links in the style you define.
Creating a Direct Link - DirectURLs
In the Behavior Editor of each component is the ability to create a human readable and SEO friendly text link. The platform automatically assigns a unique, and sequential, number to each component added to the site tree. For example: ../1248/
In many instances the app designer will want to supplement that number with user friendly text. For example: ../data-import
You can read more about DirectURLs here...
The Manage Bank-tab enables the app owner to control or manage the components available to app builders. In a delegated environment this gives the owner control over what type and how many components can be used in the app. The Component Store contains an unlimited number of instances of the many components available within neatComponents. The app owner adds the components needed for app construction to the Component Bank. The site designer, can then use items in the Component Bank to build the Web Site.
Access to the 'Component Store' is controlled by User Group Permissions. A system, or app/site, owner can prevent access by a User to the Store even if that User otherwise has edit control and access to the Layout Manager. The site owner can fill the Bank with a quantity of Components, and then when those are used up the designer would have to request more. The Bank Model may be imposed for Project Management purposes or as a charging model when reselling apps to control what changes are possible.
Creating your first app In this section |
|
Creating your first app
We learn how to add and remove pages. In this section: |
|
 What are we learning here?
Copyright © 2026 Enstar LLC All rights reserved |