| |
clearString neatComponents
| |
|
clearString neatComponents Item Types |
| Application Development | ||
Item Types | ||
To set up charges, you must first set up Item Types. Once that is done, you can proceed to set up the Charges. This page details the setting up of the Item Types, and the next page follows on with the setup of the Charges themselves. It is worth familiarising yourself with both parts before starting on your own site.
To set up Item Types
Go to the Cart component, Toolbox / Configure Cart.
This screen is made up of two tab, "Item Type & Charges" - which is the 'charge editor' where we set up the charges, and "Events" - where emails can be set up inform people about the transaction.
The tab consists of a mostly white area. As charges are configured, a grid appears in this area, showing which charges are applied to what.
In order to apply a charge to an item in the cart, we need to introduce the concept of an Item Type.
Item Types are optional if you don't need to apply charges, but for a charge to be applied to an item, it must be associated with an Item Type.
It is quite possible for all items within a site to be of the same Item Type, in which case there is just one Item Type, but you still need it.
To define a new Item Type
Click 'Add Item Type'
This displays the Cart Item Type Editor dialog.
Enter a name for the Item Type - for example "Books".
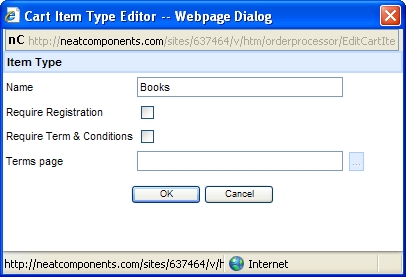
You can also specify some Registration options:
"Require Registration" - if checked, this makes sure the purchaser has registered with the site. Otherwise, they can purchase without logging on.
"Require Terms & Conditions" - if checked, this provides a checkbox the user has to check to confirm they agree to terms and conditions of purchase.
"Terms page" - allows you to specify the page on which the Terms apply.
If you have several Item Types, that each require Terms and Conditions to be agreed to, then for each Item Type reresented in the shopper's cart, they will be asked to check a box for each, and be given individual prompts with link sto the respective terms pages.
Once an Item Type has been defined it is added to the top axis of the grid.

Below each ones is a green check mark, confirming that the value of all the items in the cart, that are of each item type, will contribute to the overall 'Total payable'. The green checks are on a grey background, indicating that they can't be changed.
- To edit it, right-click on it, and choose Properties
- To delete it, right-click on it, and choose Delete
Once your Items Types have been added in this way, they become available to your catalog, where you need to assign each product to the appropriate Item Type.
Strictly speaking, you do not need to specify an Item Type to each Product, rather you need to assign an Item Type in the Sale View. Normally this comes from the product's Form (as we detail below), but it could come from another source, such as a Category Form, useful if all the products in a category are in the same Item Type.
To assign an Item Type to a Product
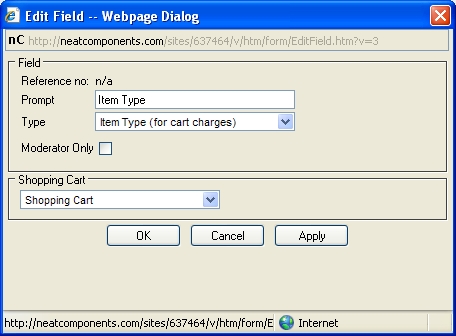
Go to the Configure Form screen of the product Form, and add a Field of type "Item Type"
Select the Cart from the dropdown
(You could, theoretically, have several Carts in a site, and since the Item Types are defined in the Cart, you need to specify which one contains the selection of Item Types to be used for this field)
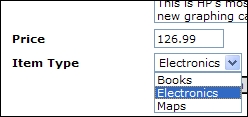
Now you can add or edit the products, and specify against each one the Item Type it is in:
To add an item into a cart the information about the product is included in a Query, and that is referenced by a Sale View, which points to the Cart.
The query needs to include the Item Type field:
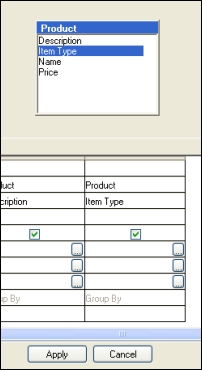
And the Sale View needs to have this field selected in the 'Cart Item Type' selector:

That concludes the setting up of the system for Item Types. Now we can set up the charges that are associated with them.
Copyright © 2026 Enstar Systems Inc. All rights reserved |